In short
- Swirls need fluid batter: stop blending at emulsion or light trace, and use a recipe that stays thin, with mostly liquid oils, a 30 to 33 % lye solution, 32 to 38 °C and a fragrance you have tested.
- Get everything ready before the lye meets the oils: colours dispersed, portions planned, tools and mould in reach.
- One or two passes with the tool. Contrast comes from light against dark, not from more swirling.
- Muddy bars come from over-swirling, colours that mix to brown, or dyes that bleed.
- If the batter thickens halfway, change the design: spoon swirls and textured tops want thick batter.
On this page
A swirl is two or more colours of batter moved through each other while they can still flow. Every technique below is a different way of doing that, and every one fails the same way: the batter thickens before the design is finished. So the work starts before any colour is poured, with a recipe and a routine that keep the batter thin.
Why a swirl needs thin batter
Poured batter sinks into thin batter, spreads across it, and lets a chopstick through without a trench closing behind it. Thick batter does none of that: poured colour sits on top in ropes, the tool drags lumps and leaves channels, and air gets trapped as holes in the cut bar. Within the fluid range, thickness sets the pattern: Alicia Grosso gets finer swirls from thinner batter and bigger blocks of colour from thicker, and finds that a colour poured thicker than its base sinks right through it. Depth matters too. The deeper the mould, the harder it is to carry a pattern all the way through, so for swirls she aims for batter 5 to 7.5 cm (2 to 3 in) deep.
Most swirls want light trace, thin custard that holds a faint line for a few seconds. The drop swirl wants even less, batter only just emulsified. The spoon swirl is the exception that wants medium trace, which is why it is the design to switch to when a batch thickens on you. The trace guide explains how to read the stages.
A recipe that stays fluid
Trace speed is decided mostly before you start: by the oils, the water, the temperature and the fragrance.
Oils. Recipes built mostly on liquid, high-oleic oils (olive, rice bran, canola, high-oleic sunflower) trace slowly. Palm and castor oil speed it up: Fisher says they make his own everyday recipe too fast for intricate swirls, and his slow-moving recipe swaps them for lard and canola. Olive oil is slow only in its ordinary grades: Faiola and Cavitch both find pomace traces fast, and Cavitch adds that it makes a darker soap, so keep it out of design batches.
Water. Less water means faster trace, so a design batch is the wrong place for a water discount. A lye solution of 30 to 33 % gives time. Weaker than about 31 %, a white base that goes through a full gel can show glycerin rivers, so with a titanium dioxide base either stay at 31 to 33 % or keep the loaf from gelling fully (colouring soap explains the rivers).
Temperature. Cooler batter traces more slowly, up to a point. Around 32 to 38 °C (90 to 100 °F), a little below the 38 to 43 °C (100 to 110 °F) many basic recipes use, suits the recipe below, as long as the melted oils stay clear. Much cooler and the hard fats begin to set, which thickens the batter just as surely (false trace); Faiola lists soaping too cool, as well as too hot, among the causes of acceleration. The books disagree on the number. Grosso combines swirl batches at 41 to 43 °C (105 to 110 °F), because the batter will be split into small portions that cool as you work, and Faiola’s design recipes in Pure Soapmaking run at 43 to 49 °C (110 to 120 °F). The cooler figure suits our mostly liquid-oil recipe; a recipe with butters in it needs to stay warm enough that its jugs don’t start to set. Grosso is firm on one thing: the room-temperature method, where the hot lye solution melts the solid fats, “coupled with using reduced water is a recipe for swirling disaster”.
Blending. Use the stick blender only until the batter is emulsified, in short pulses, then finish with a whisk. Every extra second of blending is time taken from the design.
Fragrance. A fragrance that accelerates is the most common reason a batch seizes, so never use an untried one in a swirl. Test it in a small plain batch first. If you know it behaves, you can add it to the oils before the lye, as Faiola does in her linear swirls; if it misbehaves, you find out before the colours are split. Scenting soap and seizing and acceleration have more.
Additives. Clays thicken batter quickly, and sugars, honey and milk heat it and speed trace. Put clay colours in the portions you pour last, or save them for a spoon swirl.
Here is a swirl-friendly recipe sized for a 25 × 9 cm loaf mould filled 6 cm deep:
| Ingredient | Share of oils | Weight |
|---|---|---|
| Olive oil | 45 % | 405 g |
| Coconut oil | 25 % | 225 g |
| High-oleic sunflower oil | 20 % | 180 g |
| Shea butter | 10 % | 90 g |
| Sodium hydroxide | 125.3 g | |
| Water | 278.8 g |
5 % superfat, 31 % lye solution. About 1,304 g of batter, or 1,331 g with fragrance at 3 % of the oils. Figures from the lye calculator.
It is the blend in our three-colour hanger swirl bar, and a relative of the palm-free classic with more liquid oil and no castor. Recipes high in liquid oils set more slowly than harder ones, so give it an extra day or two in the mould before you unmould it.
A slow recipe for swirls. 900 g of oils at a 31 % lye solution needs 125.3 g of sodium hydroxide and 278.8 g of water.
Open it in the calculatorBefore the lye meets the oils
Once the lye goes in, the batter is on a clock. Everything else happens first:
- Disperse the colours in their cups, as the colouring guide describes, and stir them just before use.
- Plan the split. Decide how much batter each colour gets and write it down; the colouring guide shows the arithmetic. A white or pale base between the colours keeps them clear.
- Set out the containers. Jugs with sharp spouts for pouring lines, squeeze bottles for fine lines and dots, one per colour.
- Ready the tools and the mould. Chopsticks or skewers, a spatula, the hanger tool or dividers if the design uses them, and the mould lined, level and within reach.
- Allow the time. A five-colour design can take ten minutes to pour. If that is longer than your recipe gives you, use fewer colours.
Once the batter is split, Faiola divides the fragrance among the jugs and whisks it in from the lightest colour to the darkest, and gives any jug that has started to thicken a gentle whisk just before she pours it.
In-the-pot swirl
The simplest swirl: the colour goes back into the pot and the pour into the mould does most of the work. Our indigo in-the-pot swirl bar is one to try.
- Colour a portion. At light trace, pour about a third of the batter into a jug holding the dispersed colour and whisk it in. For several colours, colour several smaller portions and whiten what stays in the pot.
- Pour it back from height. Pour the coloured batter back into the pot in three or four places, some from high up so it plunges to the bottom, some from low down so it stays near the top.
- Stir once or twice. Draw a spatula or chopstick round the pot in one or two circles. No more.
- Pour into the mould. Pour from one spot or move along the mould. The pour carries the swirl further.
- Finish the top. If you like, draw a chopstick through the top 1 cm.
Drop swirl
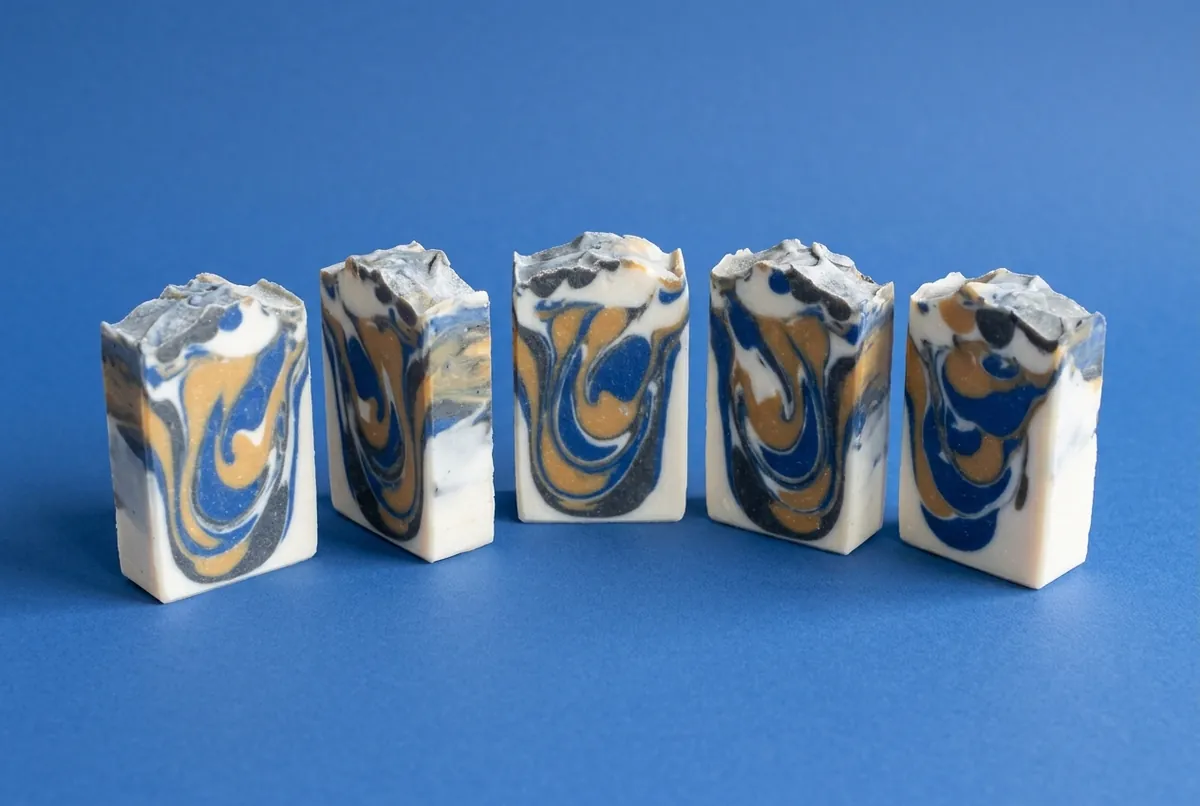
Colours dropped from a height into a base, so they plunge through it and leave streaks down the bar, as in our blue and gold drop swirl bar.
- Keep the batter barely traced. Stop blending at emulsion. The colours must sink when they land.
- Pour some base. Pour about half of the base colour into the mould.
- Drop a colour from height. Hold the jug about 30 cm (12 in) above the mould and pour a line along its length, or a zigzag. The height drives the colour down into the base.
- Alternate. Pour a line of the next colour, then some base, and repeat until the batter is used.
- Leave it, or swirl once. It is finished as it is, or you can draw a chopstick once along the length through the middle.
How much you pour at each drop, how high you hold the jug and how thin the batter is all change the size of the streaks, so note what you did.
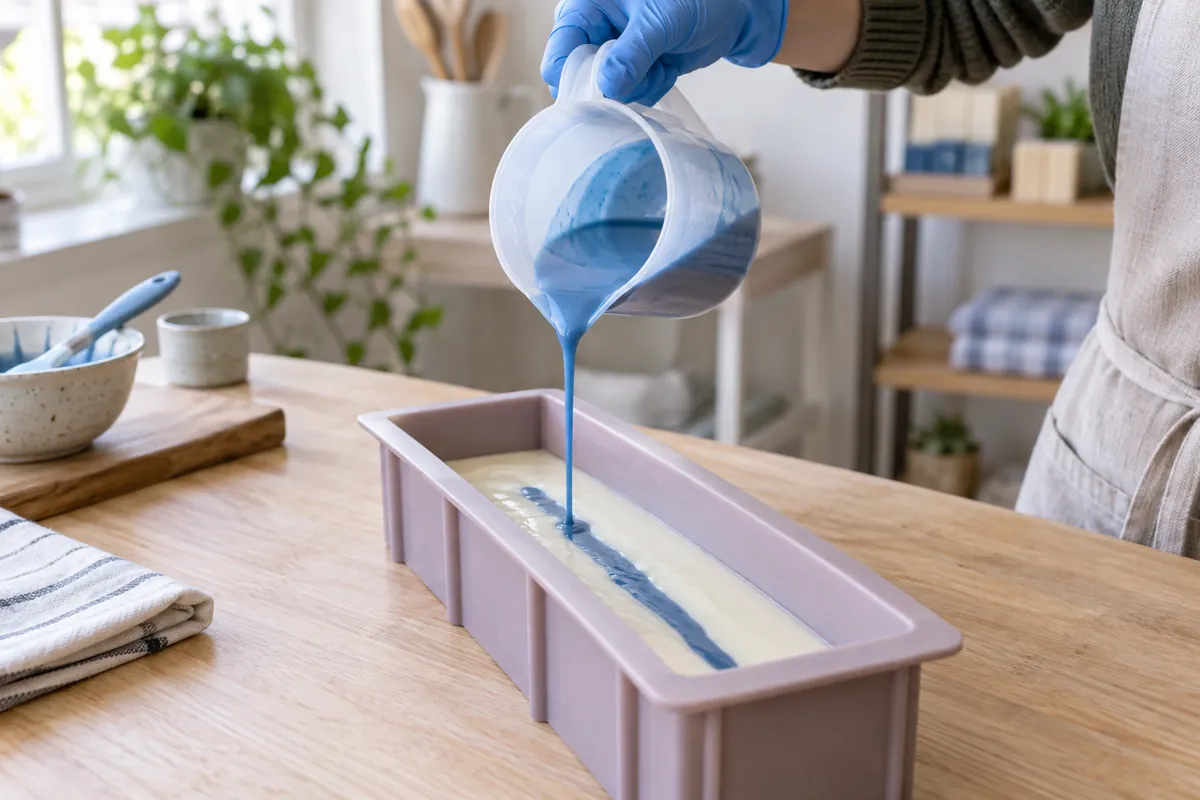 A drop swirl: thin blue batter poured from about 30 cm plunges into the white base.
Hanger swirl
A wire loop drawn up and down through layered colour. The tool is homemade and the result is a row of loops across every bar.
- Make the tool. Bend a wire coat hanger, or a length of coated copper wire, into a flat loop whose bottom run spans the inside width of your mould, with a handle rising at one side above the rim. A thicker wire, or aquarium tubing slipped over it, moves more batter and gives a bolder swirl.
- Pour the colours in layers. At light trace, pour the colours in thin layers, alternating, until the mould is full.
- Insert the loop. Push it down at one end of the mould until it lies flat on the bottom, across the width.
- Swirl along the mould. Lift the loop to just under the surface and push it back to the bottom, moving a finger’s width along each time, all the way to the far end. Faiola steps about 1 cm, Grosso about 2.5 cm (1 in); bigger steps give bigger loops. Fisher gives three other patterns to try: a horizontal zigzag, a plunge and swoop, and curls. Keep the loop under the surface the whole way.
- Take it out at the end. Lift it out at the far end only, then draw a chopstick through the top 1 cm if you like.
For designs poured with dividers, Faiola sets the tool in the empty mould before pouring, which avoids the drag mark left by pushing it in afterwards.
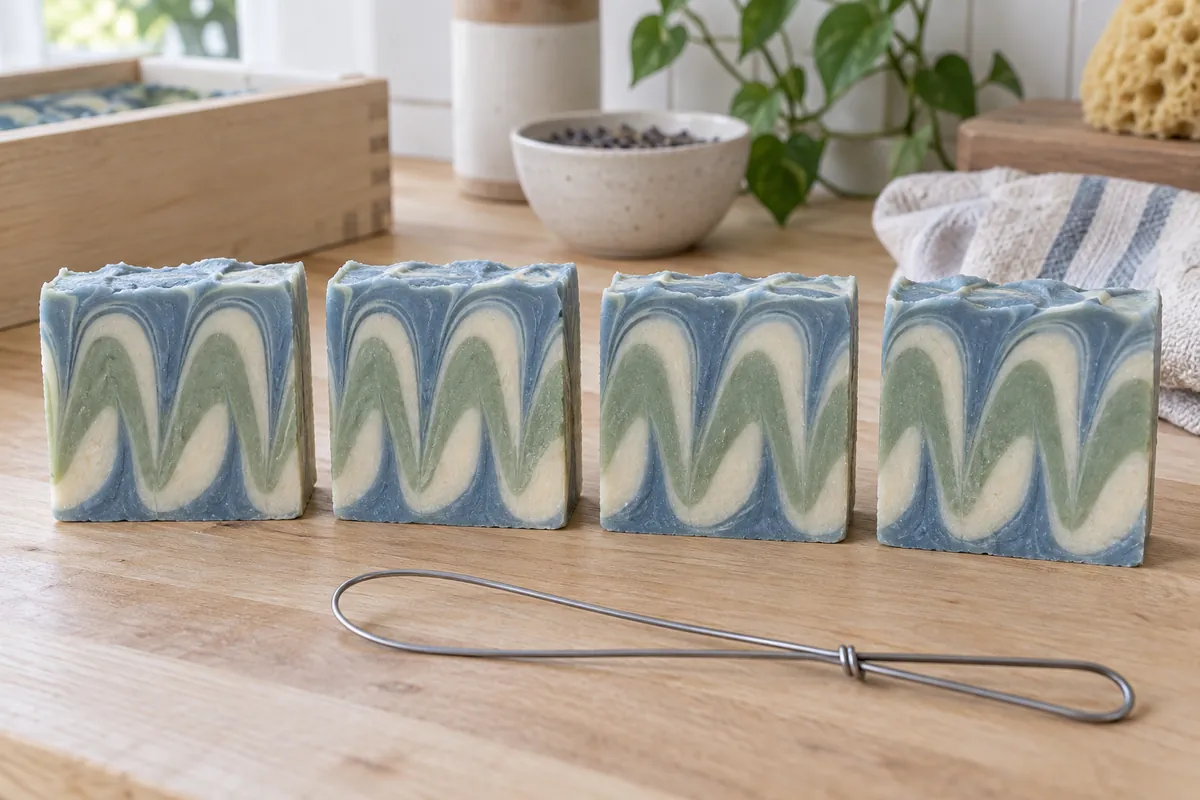 A hanger swirl in the cut bar: horizontal layers pulled into loops.
Spoon swirl
Dollops of colour spooned into the mould and dragged together at the top. It wants thicker batter than any other swirl here.
- Take the batter to medium trace. The dollops must hold their shape.
- Spoon, alternating colours. With one large spoon per colour, drop dollops of each colour into the mould in turn, in two or three places, some large and some small.
- Settle it as you go. Tap the mould on the counter after every 2.5 cm (1 in) or so of batter.
- Drizzle and drag. Drizzle what is left of each colour over the top, then draw a chopstick 1 cm deep in a zigzag across the width, working down the length. Or push the top into a peak with the back of a spoon. More passes give more texture and more blending.
Clay colours suit this one, since clays thicken the batter anyway.
Taiwan swirl
Colours poured side by side in lengthwise channels, then dragged across and along, as in our Taiwan swirl bar in charcoal and rose. Its close relative, the mantra swirl, uses a figure-eight instead.
- Divide the mould. Cut three strips of card that fit snugly along the length of a loaf mould and stand a little taller than it, making four channels.
- Pour the channels together. At light trace, pour the colours into their channels at the same time, with a helper holding the dividers steady. Tap the mould.
- Lift the dividers. Pull them straight up, slowly.
- Swirl across. Push a chopstick to the bottom at one end and drag it side to side across the width in tight zigzags, working along to the far end.
- Swirl along. Go back over it the other way: long zigzags along the length, working across the width.
- Cut to show it. The pattern runs through the whole depth. Bars cut the usual way show a slice of it; cutting horizontally, parallel to the top, shows the swirl as it looked from above, which is how Soap Queen and Fisher cut these designs.
Column pour
Colour poured over a block standing in the mould, so each pour spreads in rings; lifting the block folds the rings together. A wide slab mould shows it best.
- Set the column. Stand a block about 5 × 5 × 15 cm (2 × 2 × 6 in) on end in the middle of the mould, weighted so it stays put, with its top clear of the rim.
- Colour three or four portions at light trace.
- Pour onto the column. Pour the first colour over the top of the block for a slow count of three, then the next colour, and keep going round the colours until the batter is used. Each pour runs down the block and spreads across the mould.
- Lift the column. Draw the block straight up, slowly. The batter closes over the space and folds the rings into an uneven pattern. Tap the mould.
- Add a line, if you like. Faiola traces a white line across the top with a squeeze bottle and drags a tool through the top only.
Mica feathering on top
A finish rather than a swirl through the bar: lines of mica drawn into feathers on the surface of any design, as on our mica feather top bar.
- Make a mica oil. Stir 1 teaspoon of mica into 1 tablespoon of light oil, thin enough to drip.
- Catch the top at the right moment. The surface must still move under a skewer, at light to medium trace. Too thin and the mica sinks; too thick and it will not feather.
- Lay lines or dots. With a dropper or a teaspoon, drip a few lines or dots of mica oil across the top. A few drops go a long way.
- Feather it. Draw a skewer through only the top few millimetres, crossing the lines in loops or S-curves, and the lines pull out into feathers.
- Mist lightly. A light mist of alcohol against soda ash is fine once the pattern is drawn.
Dry mica works too: sift it through a tea strainer and blow gently across the surface to spread it. Faiola does not spray alcohol on dry-dusted mica, which turns it soggy.
Timing, and what goes wrong
| What you see | Why | Next time |
|---|---|---|
| Colour sat on top in ropes; holes in the cut bar | Batter too thick when poured; trapped air | Stop blending at emulsion; tap the mould; pour over a spatula |
| Muddy, blended colours | Too many passes, or colours that make brown when mixed (red with green, orange with blue, purple with yellow) | One or two passes; put white or a pale colour between strong ones |
| Soft, fuzzy edges between colours | Dye-based colourants bleeding | Oxides, ultramarines and micas for sharp lines |
| Batter set halfway through the design | A fragrance that accelerates, too much blending, or batter too hot or too cold | Test the fragrance; pulse less; soap at 32 to 38 °C; switch to a spoon swirl |
| Darker centre, paler edges | Partial gel | Gel all of it or none (gel phase) |
| Translucent veins in a white base | Glycerin rivers | 31 to 33 % lye solution, or no full gel |
| White dust on the top | Soda ash | Mist with alcohol; see soda ash |
Causes and fixes from Faiola, Fisher and Cable; colour mixing is ordinary colour theory.
Contrast is what makes a swirl read. Colours of similar depth, however well swirled, look flat from a step away; a dark colour against a white one looks like a design. When in doubt, use fewer colours and fewer passes.
Recipes to try
All recipesSources
- Soap Crafting: Step-by-Step Techniques for Making 31 Unique Cold-Process Soaps . Anne-Marie Faiola, Storey Publishing , 2013. In-the-pot, column, divided, linear and squeeze-bottle swirls; slowing trace; one or two swirl passes.
- The Complete Photo Guide to Soap Making . David Fisher, Creative Publishing International , 2018. The slow-moving recipe, the hanger swirl and its four patterns, spoon plops, slab and mantra swirls.
- The Natural Soap Making Book for Beginners . Kelly Cable, Althea Press , 2017. Trace stages for swirls and layers; pouring accent colour from a foot above the mould.
- The Everything Soapmaking Book, 3rd edition . Alicia Grosso, Adams Media , 2013. Trace thickness setting swirl size; thicker colour sinking through a thinner base; batter 2 to 3 inches deep for patterns that go through the bar; combining at 105–110 °F; no room-temperature method or water discount for swirls; hanger steps of about an inch.
- Pure Soapmaking . Anne-Marie Faiola, Storey Publishing , 2016. Design recipes combined at 110–120 °F; pomace olive oil speeding trace; fragrance divided among the colour jugs, whisked lightest to darkest; hanger steps of 3/8 inch (1 cm).
- The Natural Soap Book . Susan Miller Cavitch, Storey Publishing , 1995. Pomace olive oil tracing fastest and making a darker soap.
- Natural Colorant Taiwan Swirl . Soap Queen (Bramble Berry) . Supplier tutorial: three lengthwise dividers, four colours poured together, two perpendicular passes.
- Soap Challenge: Mica Topped Cold Process . Soap Queen (Bramble Berry) . Supplier tutorial: mica dispersed in oil, drizzled on the top and drawn into loops.
- Chemistry 101: Glycerin Rivers . Wholesale Supplies Plus , 2025. Supplier article; rivers appeared only below about 31 % lye concentration in fully gelled soap.