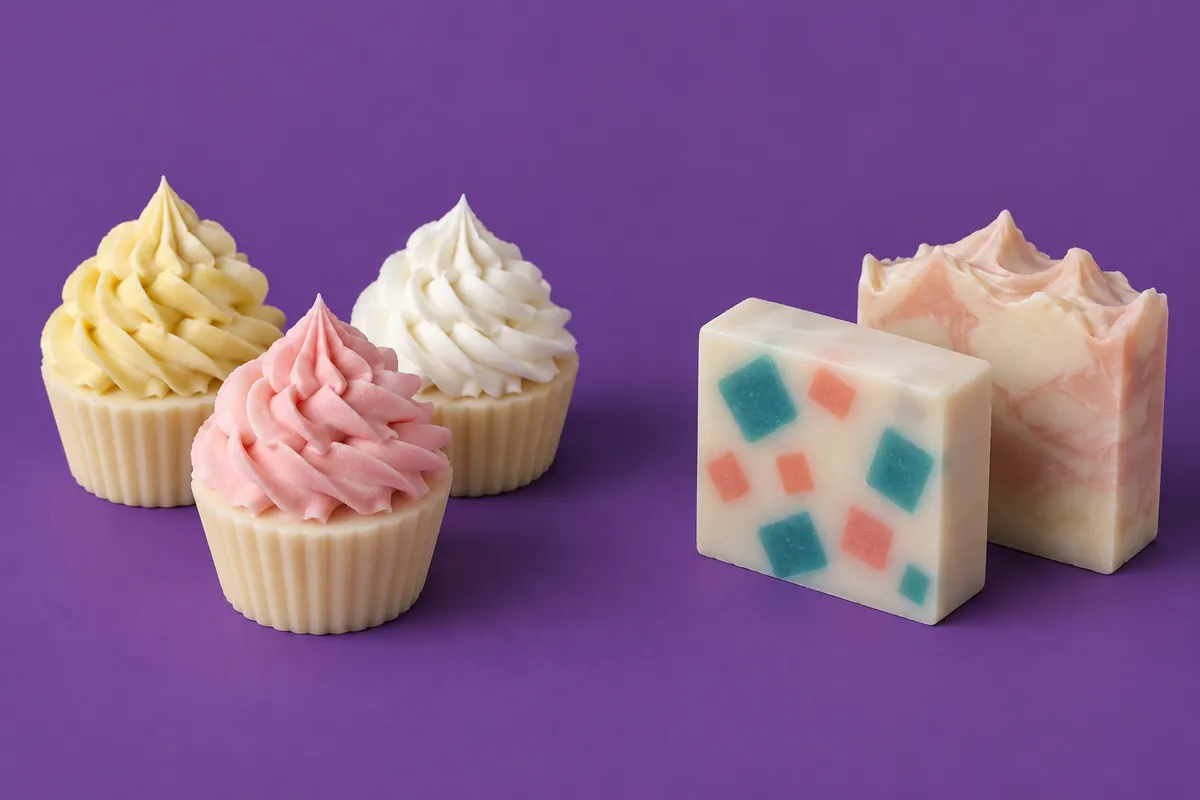
In short
- Cold-process embeds work best a day to a few days old: firm enough to handle, fresh enough to bond.
- Melt-and-pour pieces melt in the heat of gel. Keep a loaf holding them cool and uninsulated.
- Colour embeds with oxides, ultramarines or micas, which stay put, and leave room for them: 300 g of embeds takes the place of about 300 g of batter.
- Textured tops and piped frosting need thick trace. Most dried flowers and herbs brown on top; calendula keeps its colour.
- Tops are where soda ash shows first: cover or mist them, and never soak botanicals or dry mica in alcohol.
On this page
The designs in this guide sit in or on the bar rather than swirling through it. They want thicker batter than a swirl, planning a day or more ahead, and a clear idea of what heat and air will do to them.
Embeds made of cold-process soap
An embed is a piece of one soap set inside another: cubes in a contrasting colour, shapes cut from other bars, curls shaved with a peeler, or a long tube that runs through every bar. (Our loofah soap runs a piece of dried loofah through every round instead.)
Make them a day to a few days ahead. Faiola unmoulds her colour-block embeds within four days and uses them as soon as she can, while they are fresh; Corley Barto cuts her mosaic cubes after a day or two. Fresh soap is firm enough to handle and still soft enough to bond with the batter around it. Alicia Grosso makes her chunks two or three days ahead, “long enough for it to set so that it can be cut into pieces and short enough so it will still bind to the soap poured over it”, and uses the same base recipe for the chunks and the soap around them.
Colour them with colours that stay put. Oxides, ultramarines and micas hold their edges. A dye bleeds out of the embed into the base and blurs the shape (colouring soap covers which is which). Contrast does the rest: Faiola sets her blocks in a base of the opposite colour so they stand out.
Pick the size. Corley Barto uses cubes of 2.5 to 4 cm (1 to 1½ in); Cable presses in flower shapes about 2.5 cm across, cut from other bars with vegetable cutters. For confetti soap, shave a couple of bars into curls; for nugget soap, cut chunks and fold about 2 cups of them into the batter.
Get the batter right. It has to be thick enough to hold the embeds where you put them and fluid enough to flow into every gap around them. Cable pours at a thin pudding, and warns that batter too thick pulls away from the pieces and leaves gaps. Letcavage and Harden take nugget soap to heavy trace so the chunks don’t sink. In practice, medium trace for placed embeds, a little thicker for pieces stirred through. Grosso stirs such pieces into the batter until every face is coated, pours, and runs a chopstick through to clear any pockets of air.
- Pour a base layer a centimetre or two deep, at medium trace.
- Place the embeds in the pattern you want, pressing them gently into the base. Keep them off the walls: Anne-Marie Faiola warns that an embed touching the side of the mould can split the finished bar.
- Pour around and over them slowly, filling the gaps first, then tap the mould firmly to bring up trapped air. For several rows, repeat in layers, like making lasagne, as Corley Barto puts it.
- Tent anything that sticks up. Faiola covers protruding embeds with folded card before she covers and insulates the loaf.
Check the bond when you cut. An embed should sit flush and tight in the cut face. A gap you can see, or a rim you can catch with a fingernail, means the batter never filled that space, and the piece is likely to drop out as the bar wears down.
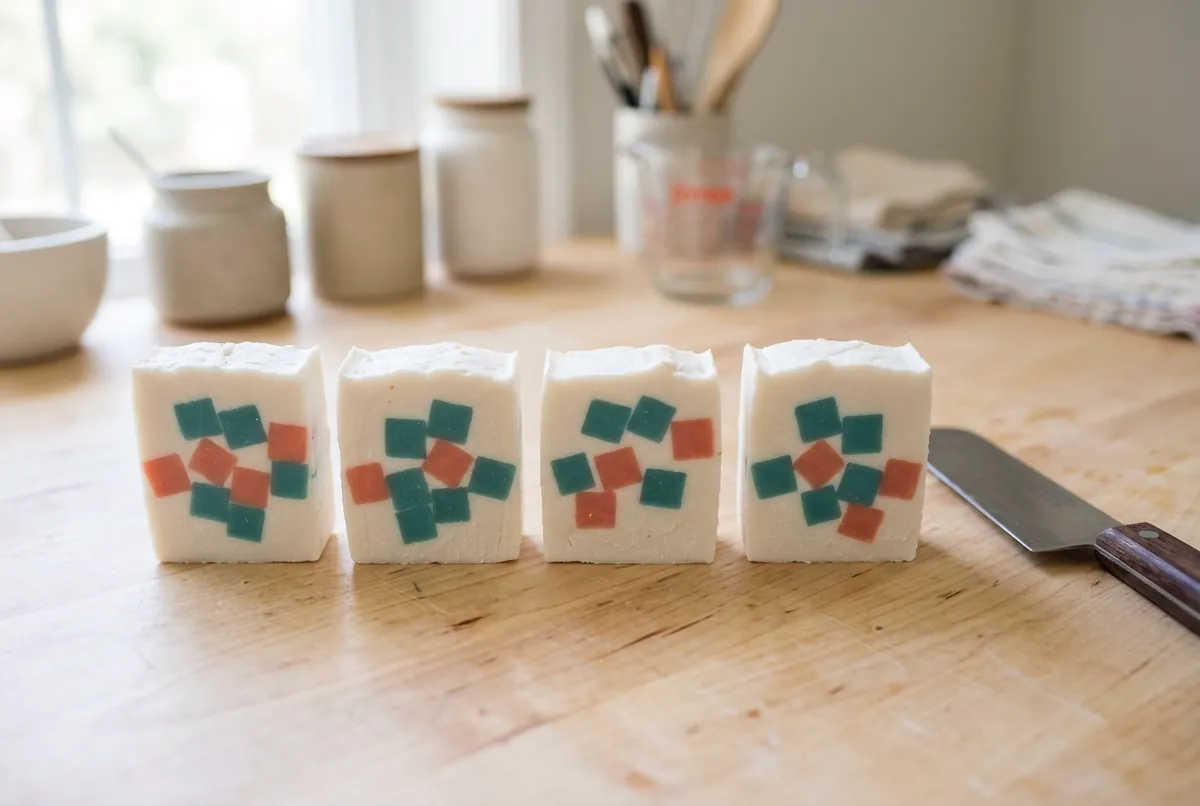 Well-bonded cube embeds: flush with the cut face, no gaps.
Leave room for them
Embeds take the place of batter. Fresh soap weighs about 1 g per mL, so 300 g of embeds fill about 300 mL of the mould. In a 25 × 9 cm loaf mould filled 6 cm deep (1,350 mL), that leaves room for about 1,050 g of batter. In the lye calculator’s Size the batch to a mould panel, enter the mould and set Fill to the share left for batter, here 78 %: for the palm-free classic with 3 % fragrance it gives 726 g of oils. Our soap embed bar is planned this way, with a quarter of one weighing list for the cubes and three quarters for the base. The moulds guide explains the sizing.
Melt-and-pour pieces in cold process
Clear melt-and-pour gives effects cold process can’t, like Faiola’s stained glass: small pieces of brightly coloured clear soap set on top of a pale cold-process bar. Two things make it work.
Keep the loaf from gelling. Melt-and-pour bases start to melt at about 49 to 54 °C (120 to 130 °F), and a gelling loaf can climb 22 to 33 °C (40 to 60 °F) above the temperature it was poured at. Poured at 38 °C (100 °F), that is 60 to 71 °C: enough to soften or melt the pieces. Faiola leaves her stained-glass loaf uncovered and uninsulated for a day or two. Small moulds and a cool room help (gel phase). Grosso does the opposite, insulating cold process around melt-and-pour pieces “to ensure fusion”, but by Faiola’s own reckoning soap gels above 60 °C (140 °F), well past the point where the pieces begin to soften.
Use a low-sweat base, and let the pieces rest. Melt-and-pour holds extra glycerin, which draws water from the air and leaves the pieces beaded with it; a low-sweat base has less. Faiola uses a low-sweat base, leaves the set pieces uncovered for 24 hours before cutting them, and cuts them no bigger than 1 cm (½ in) across. She pours the cold-process base at thick trace, so the pieces sit on the surface instead of sinking.
Colour the melt-and-pour with micas or pigments if you want crisp edges; water-soluble dyes give a clearer stained-glass look but creep into the soap around them over time. To make just enough melt-and-pour for the pieces, the melt-and-pour calculator sizes the base to your moulds, and the melt-and-pour guide covers melting it. For an overpour of melt-and-pour around embeds, Fisher’s rule is the finished weight minus the weight of the embeds.
Textured tops
Every textured top wants thick trace, batter that holds a peak (trace guide). Either pour the whole loaf thick, or pour the loaf at its usual trace and keep back a portion for the top, blended thicker.
- Peaks. Touch the back of a spoon, or the tip of a small whisk, to the surface and lift it away sharply. Dab all over for a meringue top, as on our rose clay and rose petal bar.
- A ridge. With the back of a spoon, push the batter from both long sides towards the middle to build a ridge down the length, then dab peaks along it, as Faiola does.
- Swoops. Spread the top with a spatula the way you would ice a cake; Cable calls it a frosting top.
- Ruffled layers. Faiola ruffles each layer’s surface into dips and ridges with a spoon before pouring the next colour, so the lines between layers wave.
- A mound. Grosso makes the topping as a separate batch at very thick trace and heaps it along the loaf, then scoops about 6 mm (¼ in) into the surface with the back of a knife and pulls each scoop up into a small peak.
- Spirals. Faiola’s “reverse stamp” is 25 cm (10 in) of stainless steel wire coiled into a 4 cm (1½ in) spiral. Pressed just under the surface and pulled straight up, it draws the soap into a spiral; if the top is too thin to hold it, wait five minutes and try again.
- Bubble wrap. Press a sheet of small-bubble wrap gently onto the poured surface and leave it until the soap is firm; it leaves a honeycomb pattern. Corley Barto notes that it keeps soda ash off as well. A sheet in the bottom of the mould textures the base instead, which is how our honey and beeswax bar gets its honeycomb.
Leave room above the top. Faiola tents peaked tops with folded card before covering the mould, so the lid or towel doesn’t flatten them.
Toppings
Most botanicals brown. Most dried flowers and herbs turn brown or black on fresh soap, whatever colour they went on. Calendula petals are one of the few that keep their colour, a warm yellow, as on our lavender and calendula bar. Use the others for texture and scent rather than colour: the rose petals on the rose clay bar go dark brown. See botanicals in soap.
Press them in. Sprinkle toppings while the top is still soft and press them in gently with a gloved hand, so they bond; loose ones fall off in the first wash. Faiola sets fine toppings, such as whole oats or lemon peel powder, by blowing gently across the surface.
Dust mica dry. Sift it through a tea strainer and blow gently across the surface to spread it evenly.
No alcohol on these. Faiola does not spray alcohol over botanicals or dusted mica: it turns them soggy. Keep such tops covered, or let the loaf gel, to hold off soda ash instead.
Keep toppings sparse on a bar meant for daily use: every one of them washes off, and some scratch on the way.
Piped frosting and soap cupcakes
A soap cupcake is two batches: a cake base in cupcake moulds and a stiff frosting piped on top.
The cake. Pour an ordinary recipe at thick but pourable trace into silicone cupcake moulds, aiming at the centre of each so it forms a slight mound, which gives the frosting a shape to follow.
The frosting. It needs a recipe rich in fats that are solid at room temperature, so the piped shape holds. There are two ways to make it:
- Thick-trace frosting. Make a separate small batch and keep blending until the batter holds a peak like whipped cream, then pipe at once, as our piped soap cupcakes do.
- Whipped frosting. Faiola’s method whips air into it like buttercream. Cool the melted oils to about 21 °C (70 °F), when they are a creamy solid, and chill the lye solution to 16 °C (60 °F). Whip the oils with a hand or stand mixer, then add the cold lye solution on low speed, a little at a time down the side of the bowl. Keep whipping until it is fluffy again, 10 to 15 minutes, add the fragrance on low, then whip on medium-high until it holds stiff peaks. Colour the portions with a whisk.
Faiola’s tested frosting is 10.4 oz of palm oil, 5.2 oz of coconut oil and 1.3 oz of olive oil, roughly 60 : 30 : 10. Rounded to those shares and run through our calculator at a 5 % superfat and a 31 % lye solution, a batch of 480 g of oils, about what she used for 12 cupcakes, looks like this:
A piping frosting for 12 cupcakes. 288 g of palm oil, 144 g of coconut oil and 48 g of olive oil take 70.1 g of sodium hydroxide and 156 g of water, about 706 g of frosting before fragrance.
Open it in the calculatorA palm-free frosting needs the same thing from different fats, a large share that is solid at room temperature; test any substitution in a small batch before piping a dozen.
Watch the heat of what lies underneath. Sugars in a base can warm it enough to melt a whipped topping, so for a banana soap with a piped top Faiola soaps the base at 27 to 32 °C (80 to 90 °F) and puts the finished loaf in the freezer for 24 hours.
Piping. Use a large open-star tip. Faiola starts in the middle of the cake and pipes outwards in a circle to the edge, comes back in on top of that ring, and finishes by pausing in the centre while squeezing, then lifting away to leave a peak.
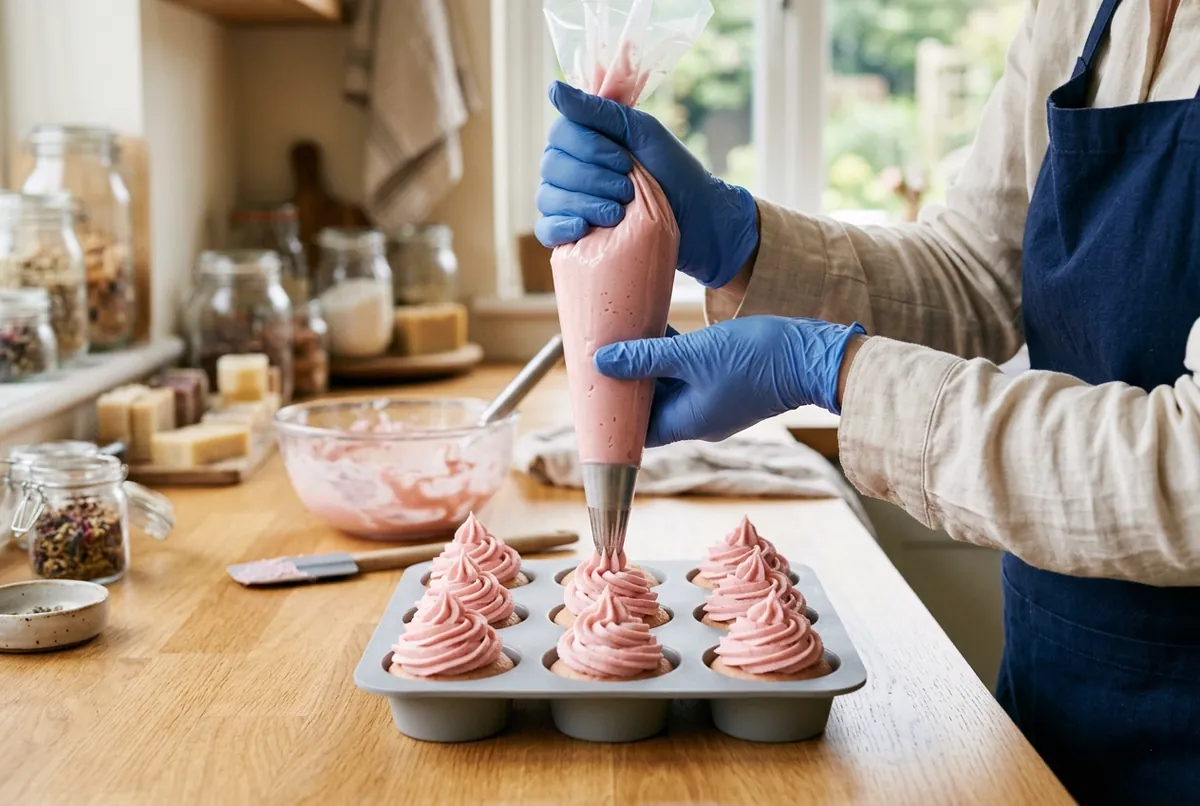 Piping from the centre outwards, then back in to finish with a peak.
After. Mist the frosting lightly with alcohol two or three times over the first 90 minutes against soda ash, leave the cupcakes in their moulds for two to four days, and cure them for four to six weeks on a rack so air reaches the bottoms. Whipped melt-and-pour, described in the melt-and-pour guide, is a lye-free alternative for decorations.
Keeping soda ash off the top
Soda ash is the white, powdery film that forms where lye still in the surface of fresh soap meets carbon dioxide in the air. It is harmless, but it dulls colours and fills the dips of a textured top, and peaks and piped frosting give it the most surface to work on. The soda ash guide covers it in full; for tops:
- Cover a flat top. Plastic wrap laid right on the surface keeps air off, and bubble wrap does the same while it textures.
- Mist, lightly. Faiola sprays 91 % isopropyl alcohol over the top up to three times in the first 90 minutes. Keep it to a fine mist: a drenched top dries out and can crack. Isopropyl alcohol is flammable, so spray well away from heat.
- Let it gel. Soap that gels is less prone to ash than soap kept cold (gel phase), which suits tops you cannot cover or spray.
Ash that forms anyway can be washed or steamed off the finished bars.
Recipes to try
All recipesSources
- Soap Crafting: Step-by-Step Techniques for Making 31 Unique Cold-Process Soaps . Anne-Marie Faiola, Storey Publishing , 2013. Colour-block and stained-glass embeds, textured and dusted tops, whipped and piped frosting, cupcake soaps, alcohol mist against soda ash.
- The Complete Photo Guide to Soap Making . David Fisher, Creative Publishing International , 2018. Bubble-wrap texture; overpour weight for embeds; calendula keeps its colour.
- Pure Soapmaking . Anne-Marie Faiola, Storey Publishing , 2016. Embeds kept off the mould walls so the bar doesn't split; the wire 'reverse stamp' spiral; a banana base soaped at 80–90 °F and frozen so it can't melt its whipped topping; gel above 140 °F (60 °C).
- The Everything Soapmaking Book, 3rd edition . Alicia Grosso, Adams Media , 2013. Chunks made two or three days ahead from the same base recipe, stirred to coat and cleared of air with a chopstick; the mounded, peaked top; insulating cold process around melt-and-pour pieces.
- The Natural Soap Chef . Heidi Corley Barto, Ulysses Press , 2012. Two-colour cube mosaic; bubble-wrap tops that keep soda ash off.
- Natural Soap Making . Elizabeth Letcavage and Melissa Harden, Stackpole Books , 2013. Nugget and confetti soap at heavy trace; flowers and herbs that brown.
- The Natural Soap Making Book for Beginners . Kelly Cable, Althea Press , 2017. Cut-out embeds pressed into batter at thin-pudding trace; frosted and textured tops.