In short
- Wear sealed goggles and gloves, and add lye to water, never water to lye.
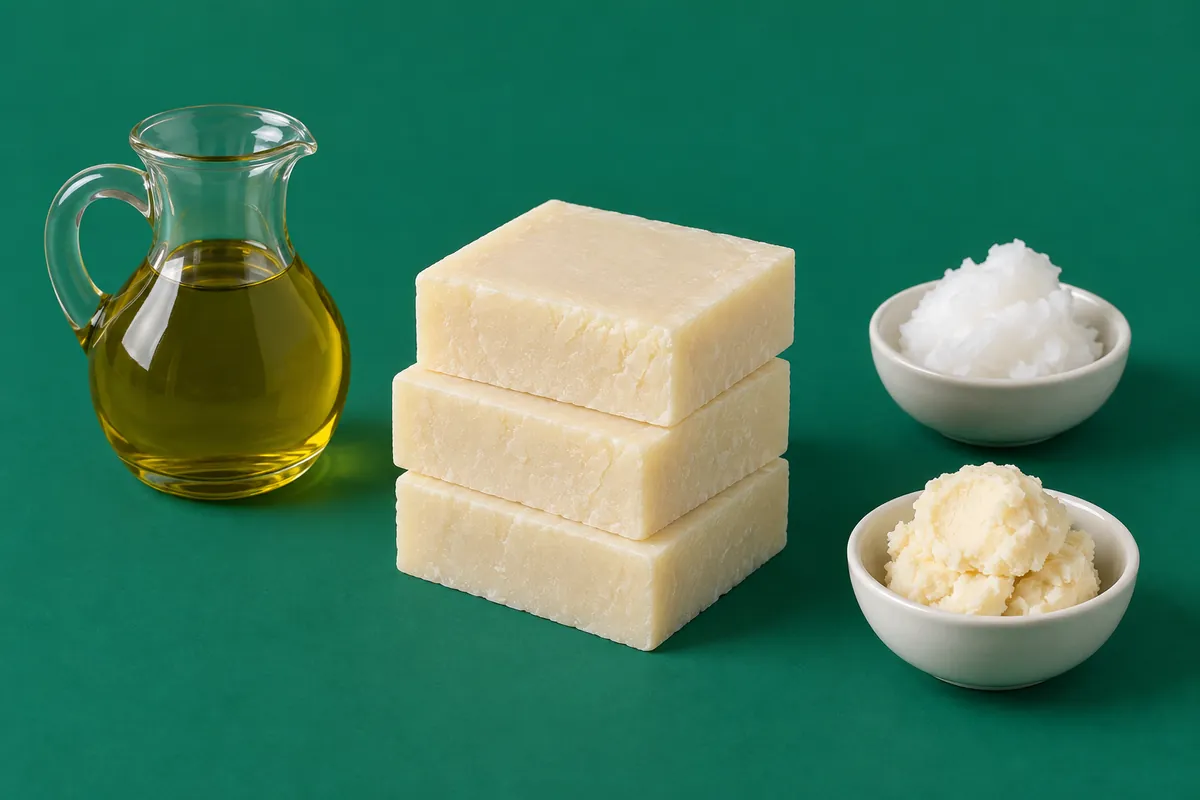
- The recipe is the one our calculator opens with: 60 % olive oil, 25 % coconut oil, 10 % shea butter and 5 % castor oil, at 5 % superfat and a 33 % lye solution.
- For 500 g of oils that is 69.5 g of sodium hydroxide and 141.2 g of water. Palm oil or lard can stand in for the shea, each with its own lye figure; never change an oil without recalculating.
- Combine when both liquids are between about 32 and 43 °C (90 and 110 °F), blend in short pulses to light trace, pour and cover.
- Unmould and cut after one or two days, then cure the bars for four to six weeks before using them.
On this page
This guide takes you through a whole batch of cold process soap, from an empty worktop to bars standing on a curing rack. The making takes about two hours, and most of that is waiting for the lye solution to cool. The soap sets in a day or two and is ready to use after four to six weeks. It assumes you have read how soap is made and handling lye safely; if you have not, read them first.
Before you start
Read the whole method once before you weigh anything, so that nothing surprises you with lye in your hand. Pick a time when you will not be interrupted: two hours, no children or pets in the room, nobody else cooking. Anne Watson’s rule in Smart Soapmaking is a good one to adopt: don’t make soap tired, rushed or distracted.
Work near a sink, with a window open or the extractor fan on, and clear the worktop of everything that is not for soap. Decide now where the lye solution will stand while it cools: somewhere flat, out of reach and out of the way, where nobody could mistake it for a jug of water.
What you need
The equipment guide explains each item. This is the short list for this recipe:
- A digital scale that reads to 1 g, or better to 0.1 g. Everything is weighed, water included.
- Splash goggles, nitrile gloves, long sleeves and closed shoes.
- A heat-safe jug for the lye solution, either polypropylene (marked PP or 5) or stainless steel, and a spoon of the same to stir it. Never aluminium: lye eats it and gives off hydrogen.
- A stainless steel pot of at least 2 litres for the 500 g batch, 3 litres for the 1000 g, so the blender cannot throw batter over the rim.
- A stick blender and a silicone spatula.
- A digital probe thermometer. An infrared one only reads the surface.
- A mould that holds about 750 ml for the 500 g batch or 1.5 litres for the 1000 g. To check one, fill it with water and weigh the water: fresh batter weighs about the same as water, so the grams of water are roughly the grams of soap it takes. A silicone loaf mould is easiest; a sturdy box lined with baking paper works too.
- An old towel, paper towels and a bin bag.
Keep all of it for soap from now on. Nothing that has held lye or raw batter goes back to the kitchen.
For ingredients, use ordinary olive oil (the cheap refined or “pure” kind suits this recipe best; extra virgin works but, in Susan Miller Cavitch’s experience, traces more slowly, and olive-pomace oil is a different oil with its own lye figure); ordinary coconut oil, the kind that is solid below about 24 °C (75 °F), not fractionated or “liquid” coconut oil; shea butter, or one of the alternatives below; castor oil, from a chemist or online; sodium hydroxide of 99 % purity or better, sold as beads or flakes, with nothing else on the label; and distilled water. Tap water often works, but its minerals react with soap and have been blamed for rancid spots, and distilled water costs little.
The recipe
This is the blend our calculator opens with, and the one the guide to choosing oils builds up oil by oil; open the calculator and it shows the 1000 g batch below. It is also on our recipe pages, with a photograph, as the first-batch palm-free bar. Olive oil makes up most of it: it gives a mild bar and a slow, forgiving trace, which is what you want the first time. Coconut oil brings the big lather and much of the hardness; a quarter is plenty, and much more starts to feel drying. A tenth is shea butter for firmness and a creamy lather, and castor oil, at 5 %, makes the lather thicker and longer-lasting.
| For 500 g (17.6 oz) of oils | For 1000 g (35.3 oz) of oils | |
|---|---|---|
| Olive oil (60 %) | 300 g | 600 g |
| Coconut oil (25 %) | 125 g | 250 g |
| Shea butter (10 %) | 50 g | 100 g |
| Castor oil (5 %) | 25 g | 50 g |
| Sodium hydroxide | 69.5 g | 139.1 g |
| Distilled water | 141.2 g | 282.4 g |
| Batch weight | 710.7 g | 1421.5 g |
5 % superfat and a 33 % lye solution, worked out by our calculator. The 500 g batch fills a mould of about 750 ml and cuts into six or seven bars; the 1000 g batch fills about 1.5 litres and makes twelve to fourteen.
Instead of shea butter
Shea butter keeps the bar free of both palm and animal fat. It comes from a tree nut, though, so if anyone who will use the soap has a nut allergy, use palm oil or lard instead, at the same weight. Palm is the classic choice; if you use it, look for RSPO-certified oil (the palm-free guide explains why that matters), and melt and stir the whole tub before you weigh any out, as Anne-Marie Faiola does every time: palm separates into harder and softer parts as it stands, so a scoop from an unstirred tub is not the oil the recipe assumes. Lard is usually the cheapest and makes a very white, mild bar. Each takes its own lye:
| In place of the shea butter | Palm oil | Lard |
|---|---|---|
| 500 g batch: sodium hydroxide | 70.1 g | 70.0 g |
| 500 g batch: water | 142.3 g | 142.2 g |
| 1000 g batch: sodium hydroxide | 140.2 g | 140.1 g |
| 1000 g batch: water | 284.7 g | 284.4 g |
Everything else in the recipe stays as it is.
What the settings mean
The superfat is 5 %: the lye is enough for 95 % of the oils, and the rest stays in the bar as oil (the superfat guide explains why every recipe does this). Shea butter’s published saponification values spread wider than most fats’ (its oil page has the figures), but at a tenth of the oils it moves the lye very little. Even if every oil in the pot sat at the bottom of its saponification range, about 2 % of the oil would still be left over as oil, and palm or lard in place of the shea leaves the same margin.
The water is set as a 33 % lye solution, about one part lye to two parts water. That is our calculator’s default and a middle course: enough water to give you time before trace, little enough that the bars firm up and dry in a reasonable time. The calculator puts the bar inside the usual ranges for every soap quality (hardness 35, cleansing 17, conditioning 62). Those ranges are a hobby convention, not a measurement, but they do say nothing here is extreme.
If your scale reads only whole grams, round the lye down: 69 g rather than 69.5 g. Rounding down raises the superfat a little (to 5.7 % in that case); rounding up eats into it.
Check the numbers yourself. The 500 g batch asks for 69.5 g of sodium hydroxide and 141.2 g of water.
Open it in the calculatorTemperatures, and what trace looks like
Soap when the oils are fully melted and clear, and both the oils and the lye solution are somewhere between about 32 and 43 °C (90 and 110 °F). That is the window Anne Watson uses in Smart Soapmaking, and as she points out, the two don’t have to be at the same temperature as long as each is inside it. Below the window the solid fats start to set again and thicken the batter before any soap has formed, which is called false trace. Above it, trace comes fast and the loaf runs hot.
Other books draw the window elsewhere, so treat it as a working preference. Susan Miller Cavitch made her all-vegetable bars with both at 27 °C (80 °F), taking the oils off the heat at 24 °C (76 °F) so the warm pan carried them the last few degrees. Anne-Marie Faiola keeps both below 60 °C (140 °F) and likes about 49 °C (120 °F), but stays under 49 °C in silicone moulds, which can leave harmless pock marks on soap that overheats. Whatever the number, the oils must be clear when the lye goes in.
Trace is the point where the batter has thickened enough to hold a mark. For this recipe you want light trace: the batter looks like thin custard, and batter dripped from the stopped blender leaves a faint line on the surface that sinks back within a few seconds.
The trace guide goes further into the stages and what speeds or slows them.
The method
- Clear the space and put on your gear. Open a window or turn on the extractor fan, send children and pets out of the room and clear the worktop. Put on goggles, gloves and long sleeves now, and keep them on until the soap is in the mould and the tools are clean.
- Weigh everything. Weigh the coconut oil and the shea butter into the pot, the olive and castor oils into a jug, the water into the lye jug and the sodium hydroxide into a small, completely dry container, zeroing the scale each time. Weigh the lye last and close its tub straight away: it draws water and carbon dioxide from the air.
- Make the lye solution. Take the water and the lye to the best-ventilated spot you have: by the open window, under the extractor fan, or outdoors. Pour the lye into the water slowly, never the water onto the lye, and stir until the liquid turns clear. It heats up fast and can pass 90 °C (194 °F). For the first minute or so it gives off a harsh vapour, so keep your face away from it. Leave it to cool in the place you chose, labelled. Standing the jug in a sink of cold water speeds this up; keep the water out of the jug.
- Melt the solid fats and add the liquid oils. Warm the pot of coconut oil and shea butter gently until just melted, on the lowest heat and taking it off while a few lumps remain, or in short bursts in a microwave-safe jug. Then pour in the olive and castor oils, which bring the temperature down.
- Check both temperatures. When the oils are clear and both they and the lye solution read between 32 and 43 °C (90 and 110 °F), you are ready. Put the mould where it will stay for a day, level and out of reach, before you go on.
- Pour the lye solution into the oils. Pour slowly down the shaft of the stick blender or over the spatula, so it doesn’t splash. Before switching the blender on, tap it gently on the bottom of the pot to let the trapped air out, and keep the blade under the surface whenever it runs: take your finger off the switch before you lift it out.
- Blend in short pulses to light trace. Pulse for a few seconds, stir with the blender switched off, and repeat. Within a few minutes the batter turns from translucent and oily to opaque and creamy, and the oily ring where it meets the side of the pot disappears. Stop at light trace, when a drizzle leaves a faint line that sinks back within seconds. Timings vary: Faiola’s recipes, soaped at 43 to 49 °C, mostly reached thin trace after about 30 seconds of blending, while this cooler, olive-rich batch takes longer. Judge it by the look of the batter.
- Add scent, if you want it. A plain first batch is a good idea, because it shows you what the soap itself is like. If you do want scent, lavender essential oil is the usual first choice: 15 g for the 500 g batch or 30 g for the 1000 g, stirred in by hand. Fragrance oils can make batter thicken suddenly, so keep them for later batches (see scenting soap).
- Pour, tap and cover. Pour the batter into the mould, scraping the pot clean with the spatula, then tap the mould firmly on the worktop a few times to let air bubbles rise. Cover it with its lid, a board or a sheet of baking paper, lay a folded towel over it and leave it for a day. It will get warm, and the middle may turn dark and glossy for a few hours: that is gel phase, and it is fine either way.
- Clean up with your gloves on. Wipe the raw batter out of the pot and off the tools with paper towels and put them in the bin, not the sink: raw batter can clog a drain. If you leave the pot and tools for a day, labelled and out of reach, what is left on them has turned to soap and washes off in hot water. Rinse the lye jug under plenty of running water.
- Unmould and cut. After 24 to 48 hours, when the loaf is firm to a pressed finger and has pulled away from the sides, put your gloves back on, unmould it and cut it into bars about 2.5 cm (1 in) thick. If it is still soft, give it another day. The unmoulding guide has the details.
- Cure for four to six weeks. Stand the bars on edge on a rack or on a tray lined with baking paper, a finger’s width apart, somewhere dry and airy and out of the sun, and turn them every few days. The soap is safe to handle well before then; the weeks are for water to leave the bars, which makes them harder, longer-lasting and milder. See curing and storing soap.
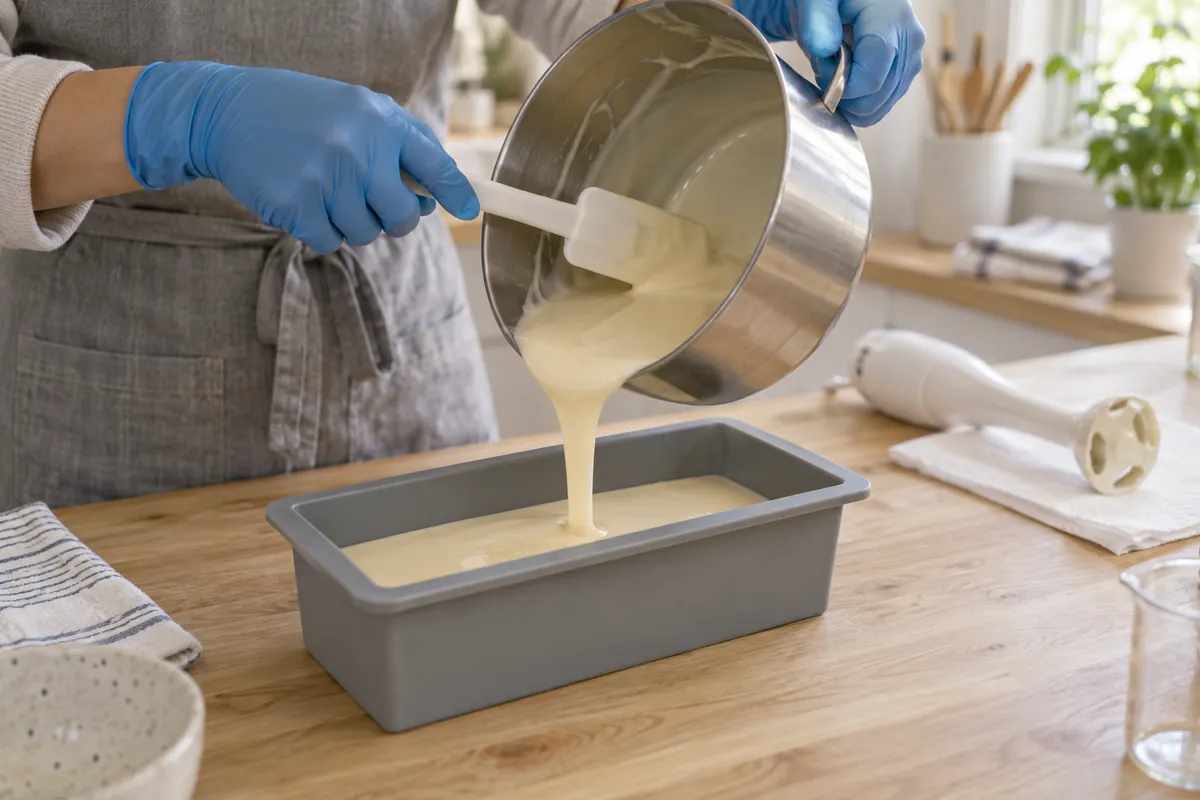 Light trace, poured: the batter runs like thin custard and settles flat in the mould.
If something looks wrong
Most first batches that look wrong are fine. This table sorts the harmless from the ones to stop and check.
| What you see | What it means | What to do |
|---|---|---|
| Still thin and streaky after ten minutes of pulsing | Cool batter, a weak blender, or a mistake with the lye | Warm the pot a little if it is below about 32 °C and keep pulsing. If it still won’t thicken, check your weights and that the lye was sodium hydroxide |
| Thickens the moment the lye goes in, then thins again as you blend | False trace: the solid fats setting | Keep blending until it traces properly; soap a little warmer next time |
| Thickens so fast you can hardly pour | Acceleration, from heat or a fragrance | Spoon it into the mould and press it down; it is still soap |
| White powder on top after a day or two | Soda ash | Harmless. Plane or steam it off, or leave it |
| A darker circle in the middle of the cut bars | Partial gel: the edges cooled first | Cosmetic only |
| Cracks or a raised ridge on the top | The loaf overheated | Cosmetic if nothing liquid seeps out; insulate less next time |
| Still soft and sticky after two days | Normal for olive-rich soap in a cool room | Wait. If it is still soft after a week, check your weights (soft soap) |
| An oily layer on top, or pockets of clear liquid inside | The batter separated in the mould | Treat it as caustic, keep your gloves on, don’t use it, and see the troubleshooting guide |
| Hard and chalky, crumbling as you cut | Probably too much lye | Don’t use it until you have tested it |
Only the last two rows mean the soap may be unsafe. Check those before anyone uses it.
If you want to check a cured bar, the soap pH guide explains pH strips and the phenolphthalein drop, and what each can and can’t tell you. Never taste soap to test it.
After this batch
Make this recipe once more before you change anything. In Anne Watson’s experience, most batches that fail are a beginner’s own first design rather than a tried recipe. A second batch of the same soap shows you what your hands, your blender and your kitchen do, and after that every change you make tells you something. When you are ready, the recipe pages have finished recipes with a method and a photograph. The classic olive, coconut and palm bar, the old-fashioned lard bar and the supermarket oils bar make good second soaps, and each one opens in the calculator.
Recipes to try
All recipesSources
- Smart Soapmaking . Anne L. Watson, Shepard Publications , 2013. The 32–43 °C (90–110 °F) working window, no need to match the two temperatures, and the advice to master one recipe before designing your own.
- Soap Crafting . Anne-Marie Faiola, Storey Publishing , 2013. Pouring the lye solution over a spatula or down the blender shaft, releasing trapped air from the blender, curing on edge.
- Pure Soapmaking . Anne-Marie Faiola, Storey Publishing , 2016. Both liquids below 60 °C (140 °F), about 49 °C preferred; under 49 °C in silicone moulds against pock marks; thin trace in about 30 seconds of blending in her tests; melting and stirring the whole tub of palm oil before weighing.
- The Natural Soap Book . Susan Miller Cavitch, Storey Publishing , 1995. All-vegetable soap made with oils and lye both at 27 °C (80 °F), oils taken off the heat at 24 °C (76 °F); extra virgin and other higher olive grades trace more slowly than refined grades.
- Natural Soap Making . Elizabeth Letcavage and Melissa Harden, Stackpole Books , 2013. Melting hard fats without overheating them; unmoulding within a week.
- The Natural Soap Making Book for Beginners . Kelly Cable, Althea Press , 2017. Blending in short bursts; covering and insulating a poured loaf; lye solution temperatures.
- The Complete Photo Guide to Soap Making . David Fisher, Creative Publishing International , 2018. Blending in 5 to 10 second bursts; stirring scent in by hand.
- NIOSH Pocket Guide to Chemical Hazards: Sodium hydroxide . US National Institute for Occupational Safety and Health . First aid: irrigate eyes and flush skin with water immediately. Incompatible with aluminium, tin and zinc.
- Medical Management Guidelines for Sodium Hydroxide (NaOH) . Agency for Toxic Substances and Disease Registry (US) , 2014. Flush skin for at least 15 minutes and eyes for at least 30; neutralising substances should not be used.
- OSH Answers: Sodium hydroxide . Canadian Centre for Occupational Health and Safety . Add corrosives slowly to cold water and never water to a corrosive; contact with metals gives off flammable hydrogen.
- Making Transparent Soap . Catherine Failor, Storey Publishing , 2000. The water reaches 200 °F (about 93 °C) moments after the caustic soda goes in.